Search "how to sharpen scissors" and you'll find a hundred videos telling you to cut aluminium foil, snip sandpaper, or run a mason jar through the blades. After 30 years sharpening scissors professionally, we can tell you exactly what those tricks do — and it isn't sharpening.
This guide is the honest version. Which scissors you can safely sharpen at home, the method that actually works, and the scissors where DIY turns a $600 pair of shears into scrap steel. We sharpen scissors for a living, so believe us when we say: we'd rather you do the easy ones yourself and send us the hard ones, than butcher the hard ones and buy new.
First, know what kind of scissors you're holding
Every pair of scissors falls into one of three groups, and the group decides everything:
- Household scissors — kitchen scissors, craft scissors, office scissors, garden snips. Flat blades, simple beveled edges, forgiving steel. Safe to sharpen at home.
- Fabric and dressmaking scissors — better steel, finer edge angle, and a knife-edge grind on good pairs. Possible at home, but easy to ruin. Once the edge angle is wrong, they chew fabric instead of slicing it.
- Hairdressing, barbering, and pet grooming shears — especially anything with a convex (Japanese-style) edge. Never sharpen these at home. Ever. More on why below.
Not sure which edge your scissors have? Our guide to convex vs beveled edges shows you how to tell in ten seconds.
The foil, sandpaper, and mason jar myths
Let's clear these up before the real method:
Cutting aluminium foil
Cutting foil doesn't sharpen anything. What it can do is burnish away tiny burrs and fold micro-rolls of the edge back into line, which makes a slightly dull pair feel marginally better for a day or two. It removes no metal and restores no edge geometry. On good scissors, the aluminium residue actually works into the pivot and blade faces and accelerates wear.
Cutting sandpaper
This one is worse than useless. Sandpaper abrades both blade faces randomly — including the inside (ride) faces that must stay dead flat for the blades to shear against each other. You're sanding the one surface a sharpener works hardest to protect. Short-term it can feel sharper; long-term you've rounded the ride line and the scissors will fold hair or fabric instead of cutting.
The mason jar trick
Opening and closing scissors around a glass jar is the same story as foil: it can realign a rolled edge on soft household scissors, and it does nothing at all for genuinely dull blades. Glass is also harder than most scissor steel, so you're gambling with chips.
Foil, sandpaper, and glass jars don't sharpen scissors. At best they disguise dullness for a few days. At worst they destroy the flat inside faces that make scissors cut at all.
How to actually sharpen household scissors: the stone method
For kitchen, craft, office, and garden scissors, a basic sharpening stone (any combination whetstone around 400/1000 grit, about $30-$60 at Australian hardware stores) does a proper job. Here's the method we'd use if we weren't using workshop machines:
- Take the scissors apart if you can. Many household scissors have a screw pivot. Separated blades are far easier to sharpen accurately. If they're riveted, you can still work with them open.
- Find the factory bevel. Look at the cutting edge — you'll see a narrow angled strip along the outside face, usually somewhere between 60 and 75 degrees to the flat. Your only job is to follow that existing angle. Do not invent a new one.
- Soak or wet the stone per its instructions, then lay the bevel flat against the coarse side.
- Stroke from pivot to tip, pushing along the edge as if you were slicing a thin layer off the stone. Keep the factory angle the whole way. Five to ten strokes is usually enough on the coarse side.
- Check for a burr. Run a fingertip carefully off the flat inside face (not along the edge). A faint wire edge along the whole length means you've reached the apex. That's the goal.
- Finish on the fine side with three to five light strokes at the same angle.
- Remove the burr flat. Lay the inside face dead flat on the fine stone and make one, at most two, feather-light strokes. Flat means flat — any angle here ruins the shear action.
- Reassemble, wipe clean, add a drop of oil at the pivot, and test on paper. A properly sharpened pair slices cleanly from pivot to tip without folding the paper.
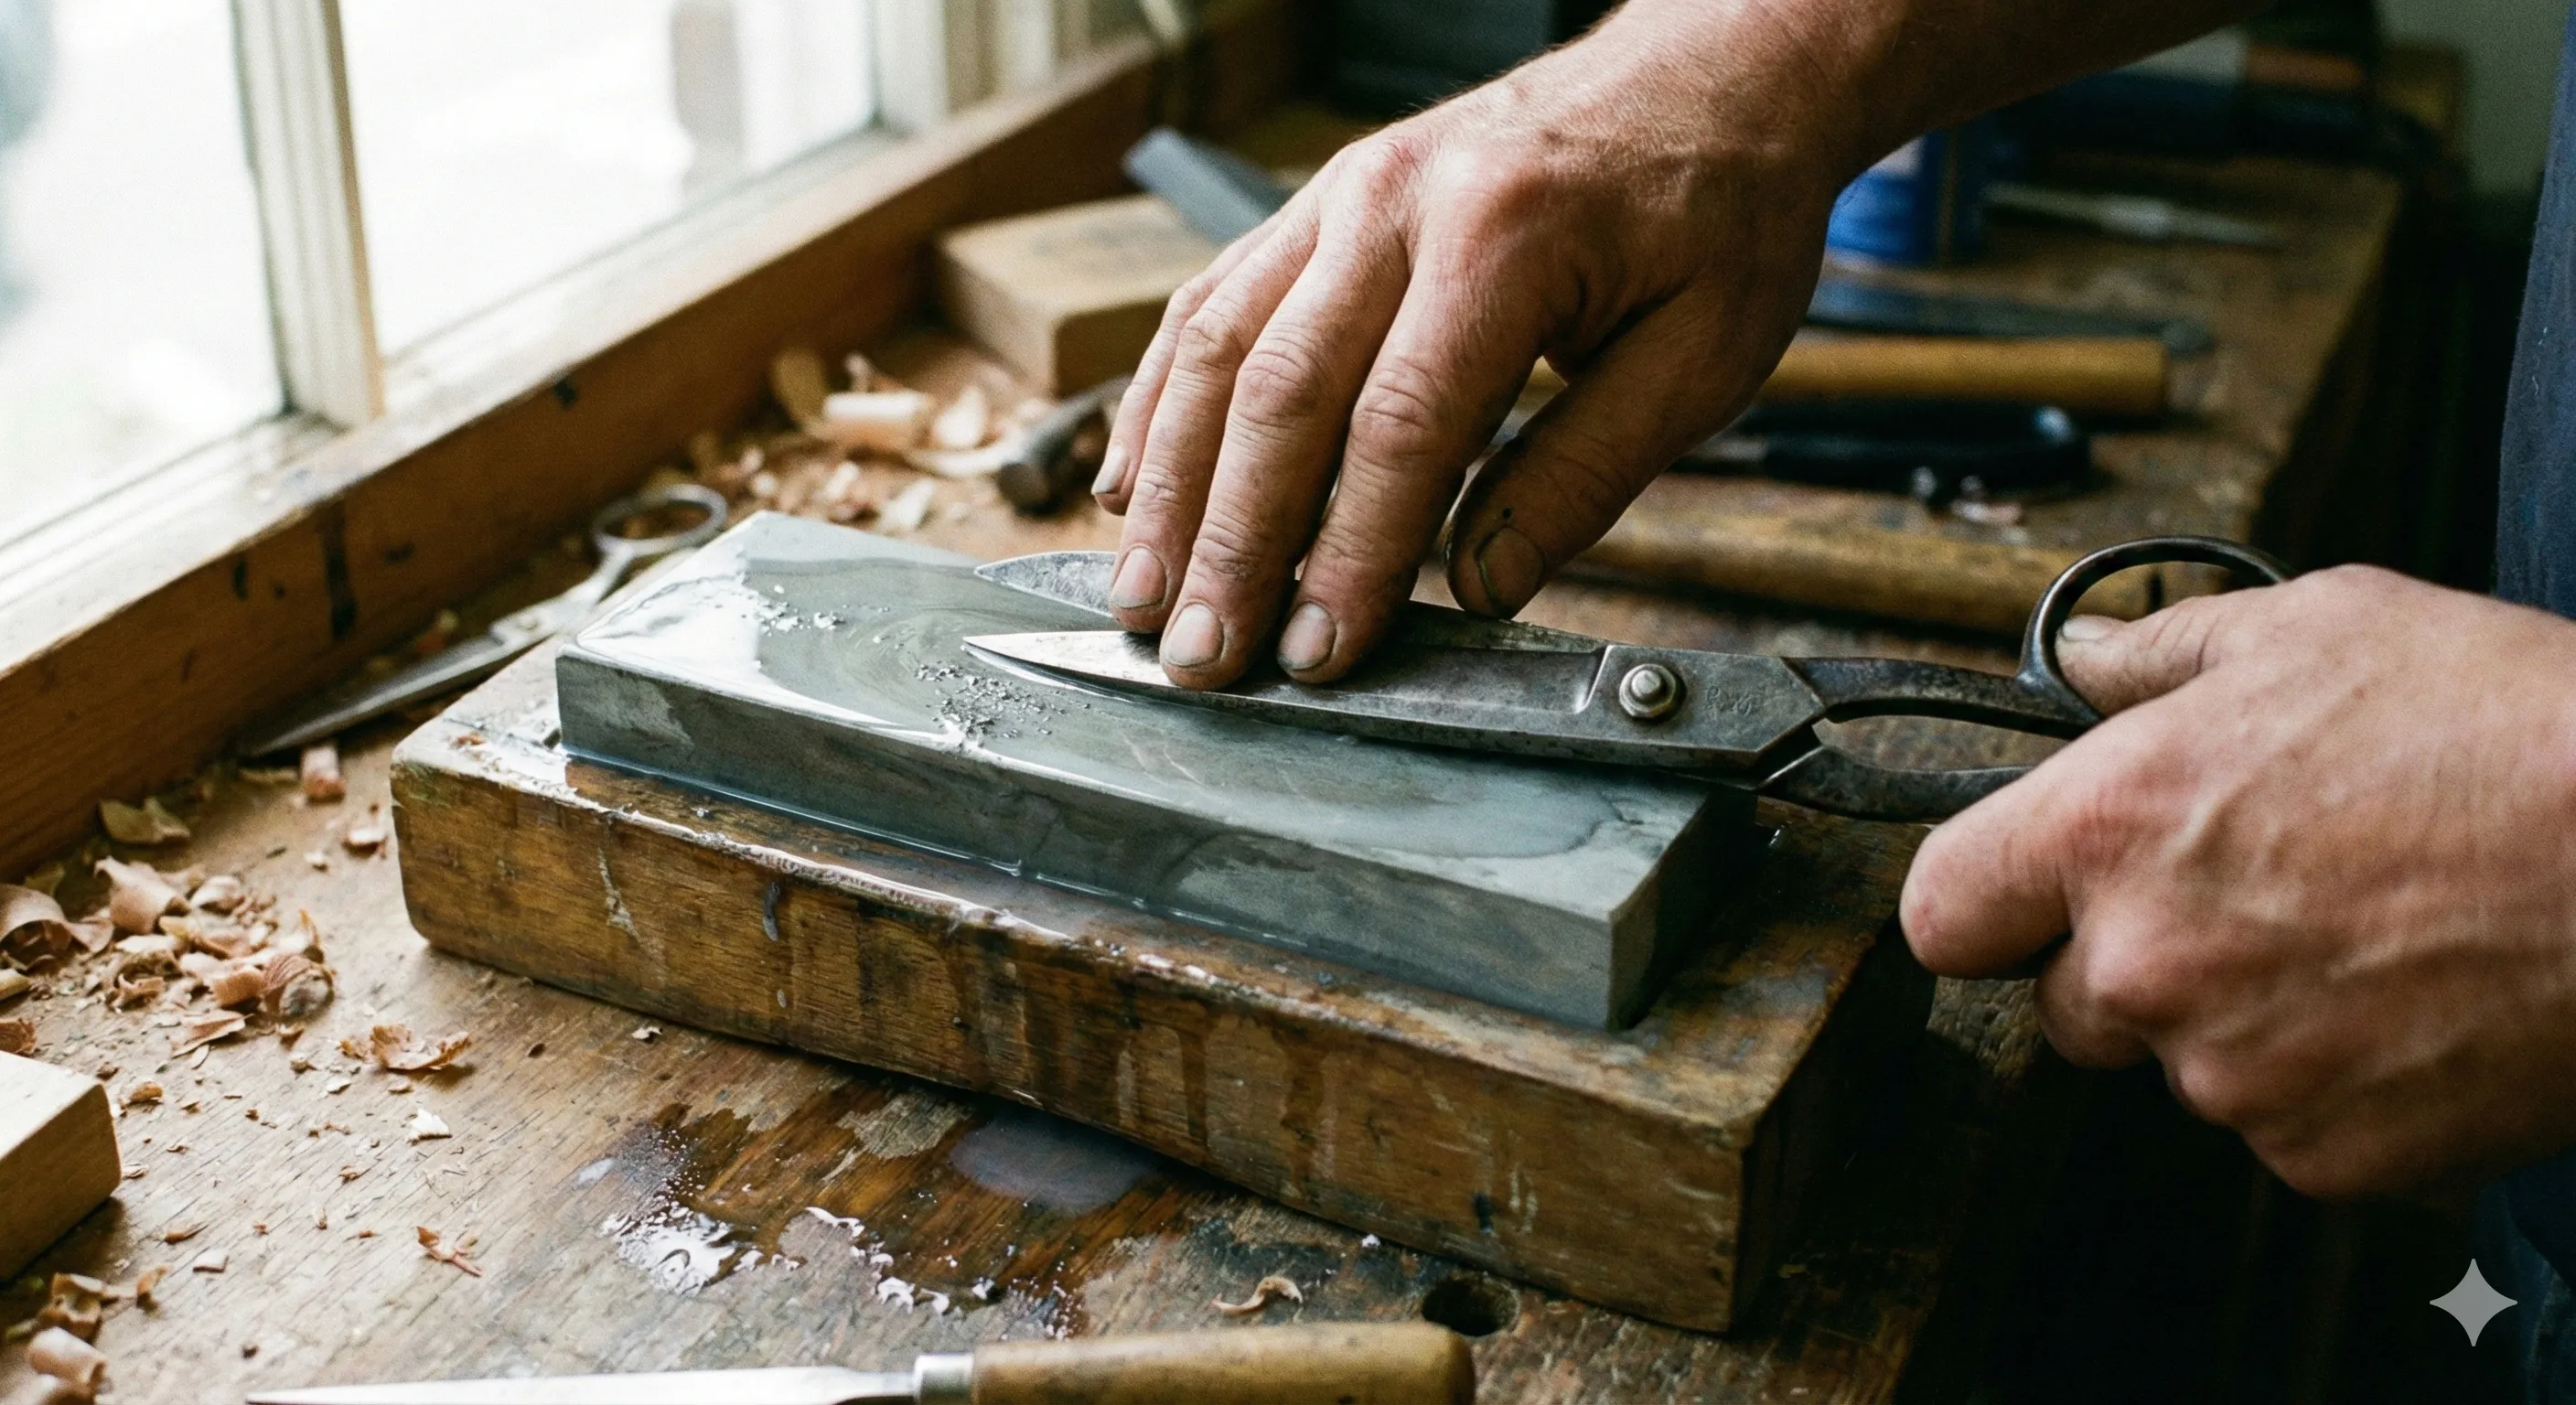
Interest in the scissor sharpening stone method has exploded lately, and for household scissors we genuinely encourage it. A $40 stone will keep every utility pair in your house cutting for a decade.
Why you should never DIY hairdressing or grooming shears
Professional shears are a different machine. Three reasons DIY ends badly:
1. Convex edges can't be done on a flat stone
Japanese-style shears (Mizutani, Kasho, Joewell, Yasaka, and most good grooming shears) have a convex edge — a smooth, curved taper with no visible bevel, polished into the blade on specialist rotating equipment. A flat stone physically cannot produce a curve. Every stroke replaces a little of the convex geometry with a flat bevel, and once it's flattened, hundreds of dollars of glide is gone. Restoring it (when possible at all) means removing serious metal on proper convex machinery.
2. The ride line is measured in microns
Shears cut because two precisely curved blades touch at exactly one moving point. The inside faces are hollow-ground and the contact line is finer than a hair. Freehand work on either inside face changes the contact geometry, and the shears start folding hair — the fault every hairdresser knows and hates.
3. Tension and balance are part of the sharpen
A professional sharpen isn't just the edge: it's corrosion removal, ride line polishing, tension reset, and a cutting test on hair-like material. That's why professional scissor sharpening in Australia costs $30-$85 rather than $10 — you're paying for geometry, not just grinding.
The maths: DIY vs professional
For a $15 pair of kitchen scissors, a $40 stone pays for itself immediately — sharpen them yourself, forever.
For a $400 pair of hairdressing shears used to earn your income, the equation flips completely. A professional convex sharpen at $85 + GST once or twice a year is cheap insurance on a tool that earns you hundreds of dollars a day. One DIY attempt that flattens the convex edge can halve the resale value of the shears and cost more to repair than years of professional sharpening.
When to send them in
Send scissors to a professional when:
- They're hairdressing, barbering, or grooming shears of any kind — especially convex
- They're quality fabric shears you'd be upset to ruin
- There are visible nicks or chips in the edge (these need controlled removal, not hand strokes)
- The blades are loose, crossed, or folding material even after cleaning
- They're expensive, sentimental, or irreplaceable
We sharpen scissors from every state, every week — it's the middle of our name. Beveled hairdressing scissors are $55 + GST a pair. Convex hairdressing scissors are $85 + GST a pair. Thinning shears are $40 + GST, pet grooming shears are $30 + GST, and fabric scissors are $22 + GST, with a 7 to 11 business day turnaround. A stylist posting two convex hairdressing pairs and one thinning pair pays 2 × $85 + $40 = $210 + GST, which is over $200 ex GST, so the return is free Express Post. One pair on its own is under that line, so return postage is charged at cost. See the full scissor sharpening service, check complete pricing, or start an order — no account needed, and we'll call you to confirm before anything happens.
Quick answers
What is the best way to sharpen scissors at home?
A combination whetstone, following the factory bevel angle, finishing with a single flat stroke on the inside face to remove the burr. It's the only DIY method that removes metal in a controlled way. Suitable for household and garden scissors only.
Does cutting aluminium foil sharpen scissors?
No. It temporarily realigns rolled edges on soft steel. It removes no metal, restores no geometry, and deposits aluminium in the pivot. Skip it.
Can I sharpen hairdressing scissors at home?
No — and this is the hill we'll die on. Convex edges require rotating convex equipment, and the internal ride line is precision-ground. DIY attempts routinely turn premium shears into scrap. Professional convex sharpening costs $85 + GST and preserves the geometry.
How often should scissors be sharpened?
Household scissors: when they stop cutting cleanly — often years. Fabric scissors: yearly for regular sewists. Professional hair and grooming shears: every 4-8 months of full-time work.